
توضیحات محصول
Description:
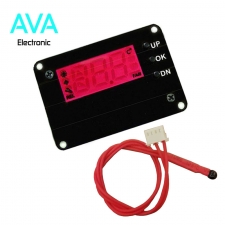
It is a digital temperature/humidity controller module. LCD display, very clear, easy to use, and powerful. It can be widely used in smart home, industrial control, automatic irrigation, indoor ventilation. Protect the device.
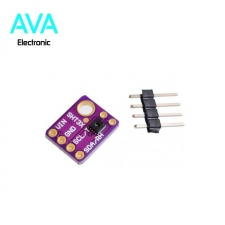
XY-WTH1 temperature and humidity control module high-precision digital display word dual output automatic constant temperature and humidity control panel.
The product uses industrial grade chip, high precision SHT20 temperature and humidity sensor
Feature:
۱٫ LCD HD display
۲٫ Power-down memory function
۳٫ Display temperature in real time
۴٫ Display humidity in real time
۵٫ Automatically save parameters
۶٫ Support UART settings
۷٫ Support measurement of temperature and humidity at the same time
۸٫ Work status indicator
۹٫ Automatically adjust working mode
۱۰٫ Independent of parameters
۱۱٫ Beautiful and practical
۱۲٫ High precision detection
۱۳٫ Display multiple parameters at the same time
Parameter:
۱٫ Product Name: Humidity Temperature Controller
۲٫ Product Code: XY-WTH1
۳٫ Working voltage: DC 6V-30V
۴٫ Control load current: 10A (maximum)
۵٫ LCD refresh rate: 0.5 seconds
۶٫ Sensor: SHT20 Humidity Temperature Sensor
۷٫ Temperature range: -20 ° C ~ 60 ° C
۸٫ Temperature control accuracy: 0.1 °C
۹٫ Humidity range: 0%-100%RH
۱۰٫ Humidity control accuracy: 0.1% RH
۱۱٫ UART data transmission cycle: 1.0 second
۱۲٫ Controller size: 79 * 43 * 35mm
۱۳٫ Sensor probe size: 60 * 30 * 20mm
۱۴٫ Sensor cable length: 1.0 m
Temperature Function:
۱٫ Automatic identification of working mode:
The module automatically selects the operating mode based on the start and stop temperatures.
The startup temperature is higher than the stop temperature and the cooling mode “C” is turned on.
The starting temperature is lower than the stop temperature and the heating mode “H” is turned on.
۲٫ Cooling mode ‘C’:
When the current temperature is higher than the starting temperature, if the load is connected, the relay turns on, the red indicator light is on, and the cooling device starts to work.
When the current temperature is lower than the stop temperature, if the load is connected, the relay is turned off, the red indicator light is off, and the refrigeration equipment stops working.
۳٫ Heating mode ‘H’:
When the current temperature is lower than the starting temperature, if the load is connected, the relay turns on, the red indicator light is on, and the heating device starts to work.
When the current temperature is higher than the stop temperature, if the load is connected, the relay is turned off, the red indicator light is off, and the heating device stops working.
۴٫ Temperature correction ‘OFE’ (-10.0~10.0°C):
If the system is working for a long time, the system may go wrong and can be corrected by this function.
Actual temperature = measured temperature + calibration value.
Setting method:
۴٫۱ Double-click the “TM +” button in the normal operation interface to enter the temperature correction setting interface. The first line shows the type of correction value (OFE or RH). The second line shows a specific value.
۴٫۲ Switch to the selected modified parameter by short pressing “TM-“.
۴٫۳ Short press “RH +” and “RH-” to set a specific value. Support long press.
۴٫۴ After modifying the parameters, double-click the “TM +” button to save the data and exit the correction value setting interface.
۵٫ Set the start/stop temperature:
Press the “TM +” button for 3 seconds on the normal operation interface to enter the startup temperature setting interface. Short press “TM +” or “TM-” to set the parameter value. After the parameters are modified, wait for 6s to automatically save and exit.
Press and hold the “TM-” button for 3 seconds on the normal operation interface to enter the stop temperature setting interface. Short press the “TM +” or “TM-” button to set the parameter value. After the parameters are modified, wait for 6s to automatically save and export.
۶٫ Relay enabled (default on):
Short press “TM-” in the normal operation interface. Turns the temperature relay output enable on or off. If the temperature relay is off, the screen will display “°C” and flash.
Humidity Function:
۱٫ Automatic identification of working mode:
The module automatically selects the operating mode based on Start Humidity and Stop Humidity.
Start humidity is greater than stop humidity and turn on dehumidification mode ‘d’.
The starting humidity is less than the stopping humidity and the humidifying mode ‘E’ is turned on.
۲٫ Dehumidification mode ‘d’:
When the current humidity is greater than the startup humidity, if the load is connected, the relay turns on, the green indicator light turns on, and the dehumidification device starts to work.
When the current humidity is less than the stop humidity, if the load is connected, the relay is turned off, the red indicator light is off, and the dehumidification device stops working.
۳٫ Humidification mode ‘E’:
When the current humidity is less than the starting humidity, if the load is connected, the relay turns on, the green indicator light is on, and the humidifying device starts to work.
When the current humidity is greater than the stop humidity, if the load is connected, the relay is turned off, the green indicator light is turned off, and the humidification device stops working.
۴٫ Humidity correction ‘RH’ (-10.0~10.0%RH):
If the system is working for a long time, the system may go wrong and can be corrected by this function.
Actual humidity = measured humidity + calibration value.
۴٫۱ Double-click the “TM +” button in the normal operation interface to enter the temperature correction setting interface. The first line shows the type of correction value (OFE or RH). The second line shows a specific value.
۴٫۲ Switch to the selected modified parameter by short pressing “TM-“.
۴٫۳ Short press “RH +” and “RH-” to set a specific value. Support long press.
۴٫۴ After modifying the parameters, double-click the “TM +” button to save the data and exit the correction value setting interface.
۵٫ Set start/stop humidity:
Press the “RH +” button for 3 seconds on the normal operation interface to enter the “Start Humidity” setting interface. Short press “RH +” or “RH-” to set the parameter value. After the parameters are modified, wait for 6s to automatically save and exit.
Press and hold the “RH-” button for 3 seconds in the normal operation interface to enter the Stop Humidity setting interface. Short press the “RH +” or “RH-” button to set the parameter value. After the parameters are modified, wait for 6s to automatically save and export.
۶٫ Relay enabled (default on):
Short press the “RH-” button in the normal operation interface. Turn the humidity relay output enable or disable. If the temperature relay is off, the screen will display “%” and flash.
Additional Feature:
۱٫ Set or read data via UART.
The temperature/humidity can be started by the UART setting, and parameters such as temperature/humidity, temperature/humidity correction, etc. can be stopped.
۲٫ Temperature/humidity real-time report.
The controller module will report the current temperature/humidity to the terminal device via the UART at 1 second intervals to facilitate data acquisition when the temperature/humidity reporting function is turned on.
۳٫ Relay enabled (default on).
If the relay is enabled to turn off, the relay remains off.
In other words, the output state does not change regardless of the measured temperature/humidity.
Steps for usage:
۱٫ Connect the sensor to the controller
۲٫ Power to the controller
۳٫ Adjust the starting temperature, stop the temperature and temperature correction
۴٫ Adjust the starting humidity, stop the humidity and humidity correction
۵٫ Enable relay output as required
۶٫ Disconnect the power
۷٫ If required in step 5, connect the load supply at the relay output terminal
۸٫ Connect the power to the controller again
۹٫ Testing and working
Application:
Control cabinet
۲٫ Production workshop
۳٫ Hatching aquaculture control
۴٫ Tobacco industry
۵٫ Printing house
۶٫ Aquarium temperature control
۷٫ Bedroom


علیرضا – :
با سلام ایا این ماژول اژیر اخطار دما یا رطوبت رو داره؟
admin – :
سلام ، خیر ولی شما به خروجی رله این ماژول میتونید آژیر اخطار متصل کنید تا هنگام خارج شدن دما از بازه تنظیم شده آژیر به صدا در بیاد.
مهدی – :
اداپتور ۱۲ولت ۱ امپر براش جواب میده؟
مهدی – :
ایا این ماژول با آداپتور ۱۲ ولت ۲ یا ۱ آمپر هم کار میکنه؟
admin – :
بله
admin – :
بله
Farshad – :
چندتا خروجی رله داره !؟
admin – :
دو رله خروجی یک رله برای کنترل دما و دیگری برای کنترل رطوبت.